
Making the plunge
I have been meaning to brew an all-grain beer for a while
but I just never got around to it. Finally, necessity, that great “mother of
invention”, forced me into this process that I had been meaning to do for a
while but never quite had the motivation to do.
I generally brew extract beers – and probably will again.
Extract brewing cuts about an hour out of the brew day by out-sourcing the
extraction of sugars from the grains. This means that I can generally brew an
extract beer in a little over three hours (from the time I start getting out my
supplies to when the kitchen is clean).
While there are other reasons for getting into all-grain brewing, I liked the idea of just being that much more involved in the process and
the cost. Extract is typically the most expensive line item in any beer I brew –
generally about 40-50% of the cost. Starting from just the grains offered a way to tackle this cost
and add some fun to the process.
As I hinted, I went
to the homebrew store meaning to brew another extract batch. However, the store
I went to was out of liquid AND dry light malt extract. I have not been a fan
of this store for a while, but this might seal the deal. These two malt extract
are foundational to extract brewing. It would be like a Mexican restaurant and
running out of tacos and tortillas. (Next time I will be checking out this new homebrew store in Boulder) Incidentally, they were also out of both of the
(popular) hop varieties that I needed.
 |
| More grain than I've ever brought into the house |
Making the all-grain set-up
I was leaving for two weeks and my home will soon be getting
a little warm for fermentation – I felt it was now or never. So, in a game-time
decision, I got the right amount of base grains instead. And a 5 gallon bucket.
In his book, The Complete Joy of Homebrewing, Charlie Papazian (the godfather
of homebrewing) suggests a quick and dirty way of getting in to all-grain with
plastic buckets.
The issue is that after you have extracted the sugars you
need to strain the liquid out of the grains. There are many set-ups for doing
this, but for me they broke down into purchasing a set-up or investing some
time in making your own with some pipes and a cooler. I did not have time to
make a nice set-up or wait for something reasonably priced to show up on
Cragslist.

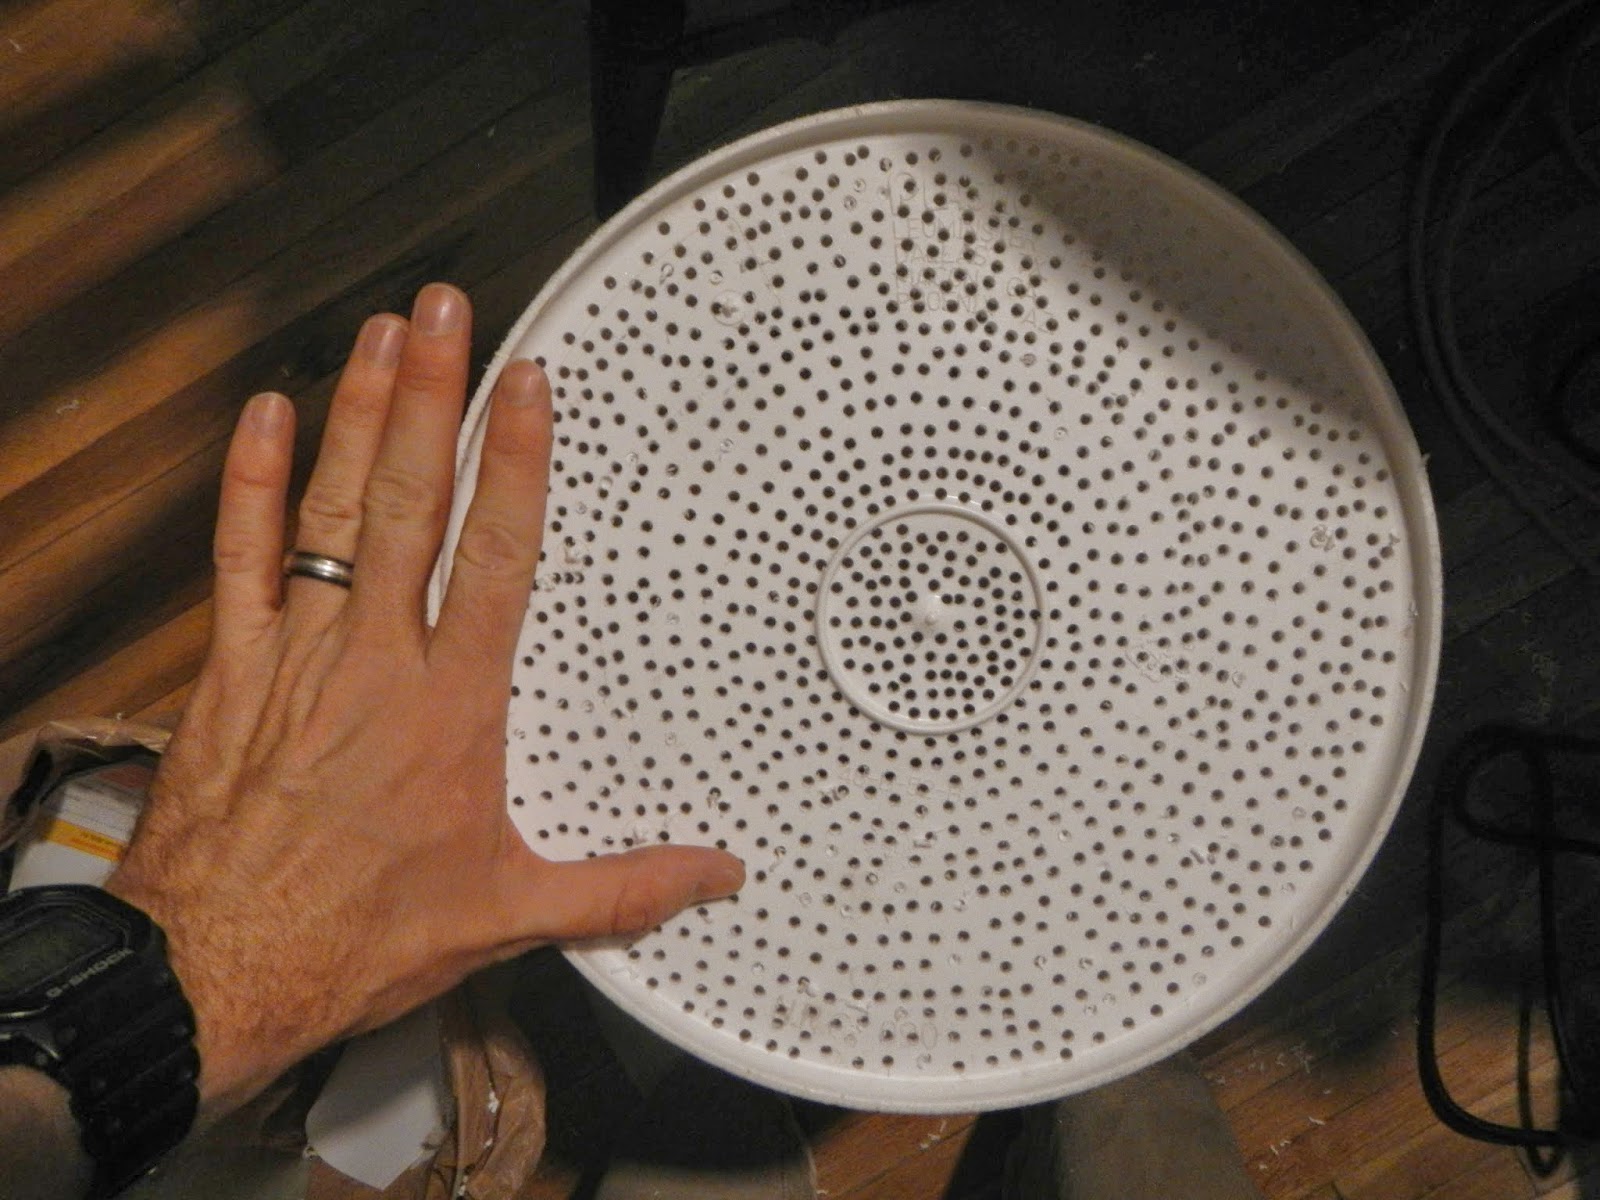
Charlie’s method drilling some holes in the bottom of one
bucket and placing this into another bucket with a spigot. A quick internet
search said that a 1/8 inch drill bit would do the trick. It took me about an hour to cover the bottom of the
non-spigot bucket with holes.
Next Time
Overall though the process seemed to work. I got wort out of
the grains and things seemed to be fermenting by the time I had to leave for
two weeks. Of course, the proof will come in another two to three weeks. As
expected, there were some learning points – especially since I decided to jump
with a little less prep that I would have liked.
Stirring the Grains for the second batch sparge
I ended up using about 15 pounds of grain. If I were to do
it again, I would probably start with a “smaller” beer. But I wanted an
imperial red, damn it. The problem with using so much grain in this set-up was
that it was hard to mix the water and grain with a plastic spoon. It was made
for brewing but it still bent a lot especially as it warmed up in the grains
and water. This was not a problem for the initial batch of the batch sparge – I
put in a little grain and water, mixed it, and then put in more grains and
water. But when I did my second batch of my sparge it was hard to mix the
grains. I could either get a stronger spoon (wooden paddle) or take the grains
out. The first method is not guaranteed to work and the second sounds messy. I
think I will eventually just go to a cooler and pipes whenI have time.
Insulation
I also put a towel around the set-up to keep in some of the
heat. The temperature at which the grains and water are at is important because
the process relies on enzymes in the malt. These enzymes like a particular
temperature range. I think this set-up lost a little more heat that I would
have liked. I might need to find some better insulation for next time.

Boil-off
The two pot set-up worked pretty well – but I lost a lot
more to boil-off than I would have liked. I may switch to a less vigorous boil
next time – especially after reading this article about induction heating which
made it seem like the vigor of the boil was not as important as I had initially
been led to believe.
 |
| Double pots in the background |
Dead-space
I completely forgot about the dead space in the bottom of
the mash-tun vessel. With the two bucket set-up this was significant (probably
a little over a gallon). I was rather sad when I when to get rid of my grains
and found these precious sugars just hanging out instead of boiling away with
their friends. Unfortunately, at this point it was a little late to add it so
this beer will not be as “imperial: as I had hoped.
Oh well. I will relax, not worry and have a homebrew. It
will still be beer.

No comments:
Post a Comment